Day 129: Guide to Hosting Your Community on Slack
This is a purely nuts-and-bolts kind of post where I’ll walk you through how I set up the Intention Community on Slack today.
Step 1: Collect signups
I collected ~190 signups for the Intention Community using in-app messaging. See this post for details.
Step 2: Create your Slack
Creating a Slack workspace is straightforward so I won’t go through those steps. Once you’ve completed that, set your workplace icon so you have some visual identity.
Open Workplace settings
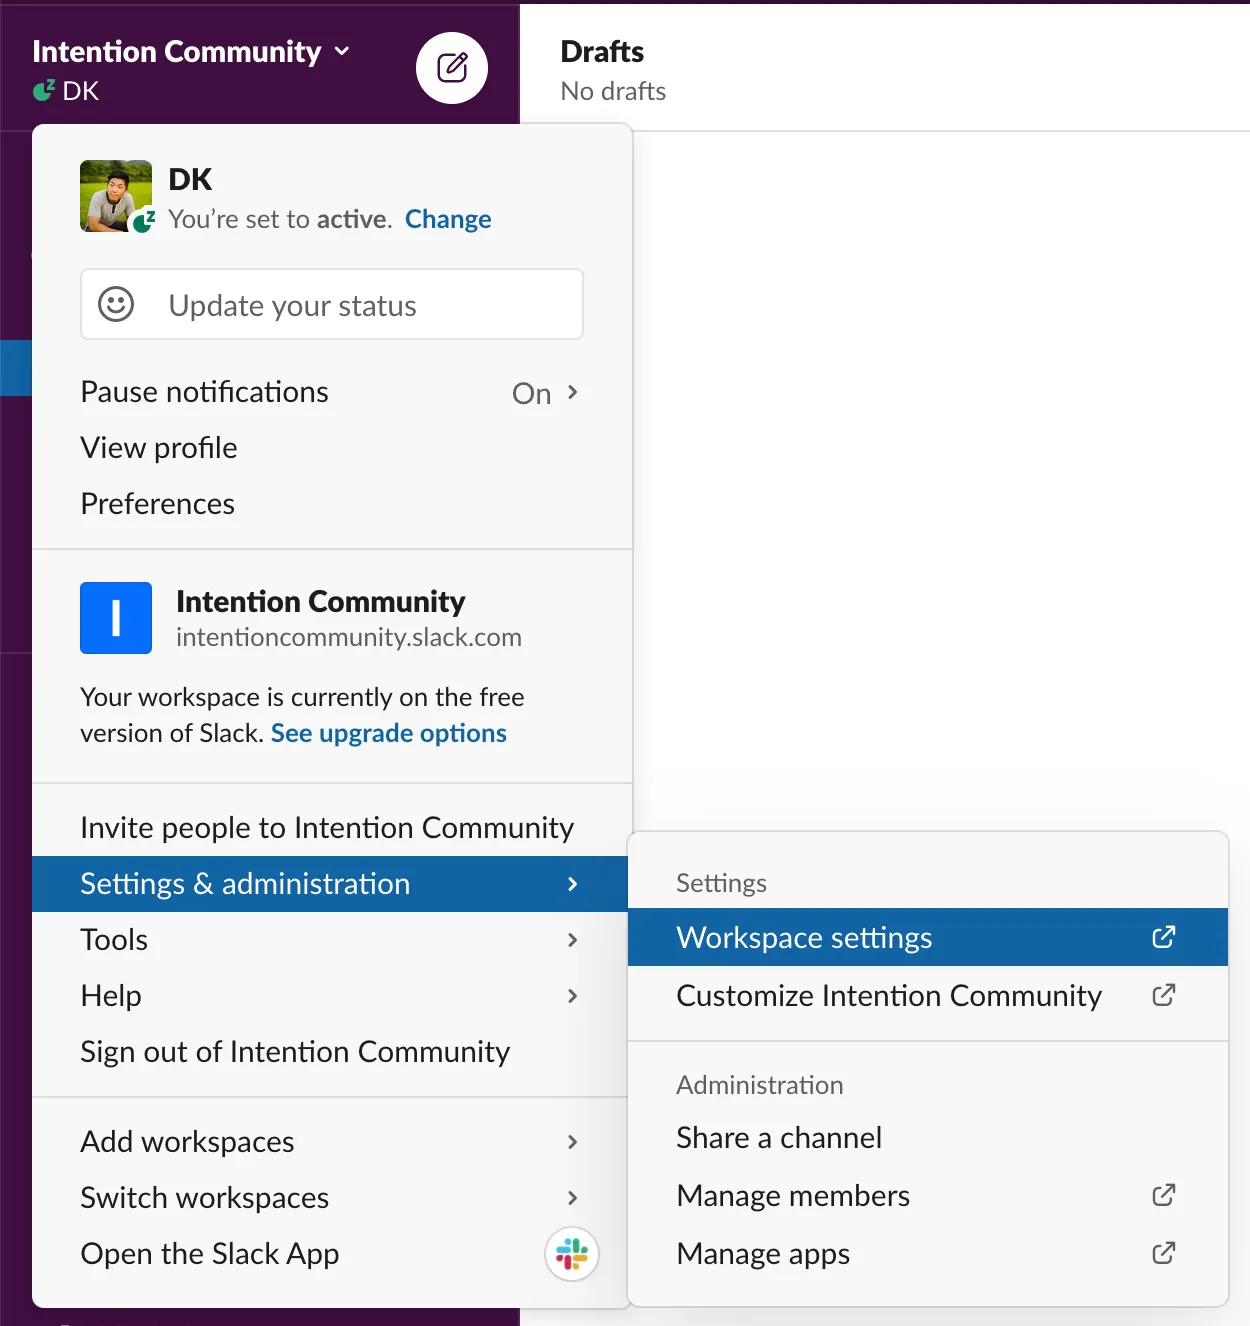
Throw up a logo

Step 3: Protect your Slack
When you’re using Slack with a work team, you can be pretty lax about the permissions because everyone knows each other and you can trust that everyone’s good judgment.
When you’re using Slack with dozens of strangers with all sorts of backgrounds who have never met each other, you want to put some safeguards in place.
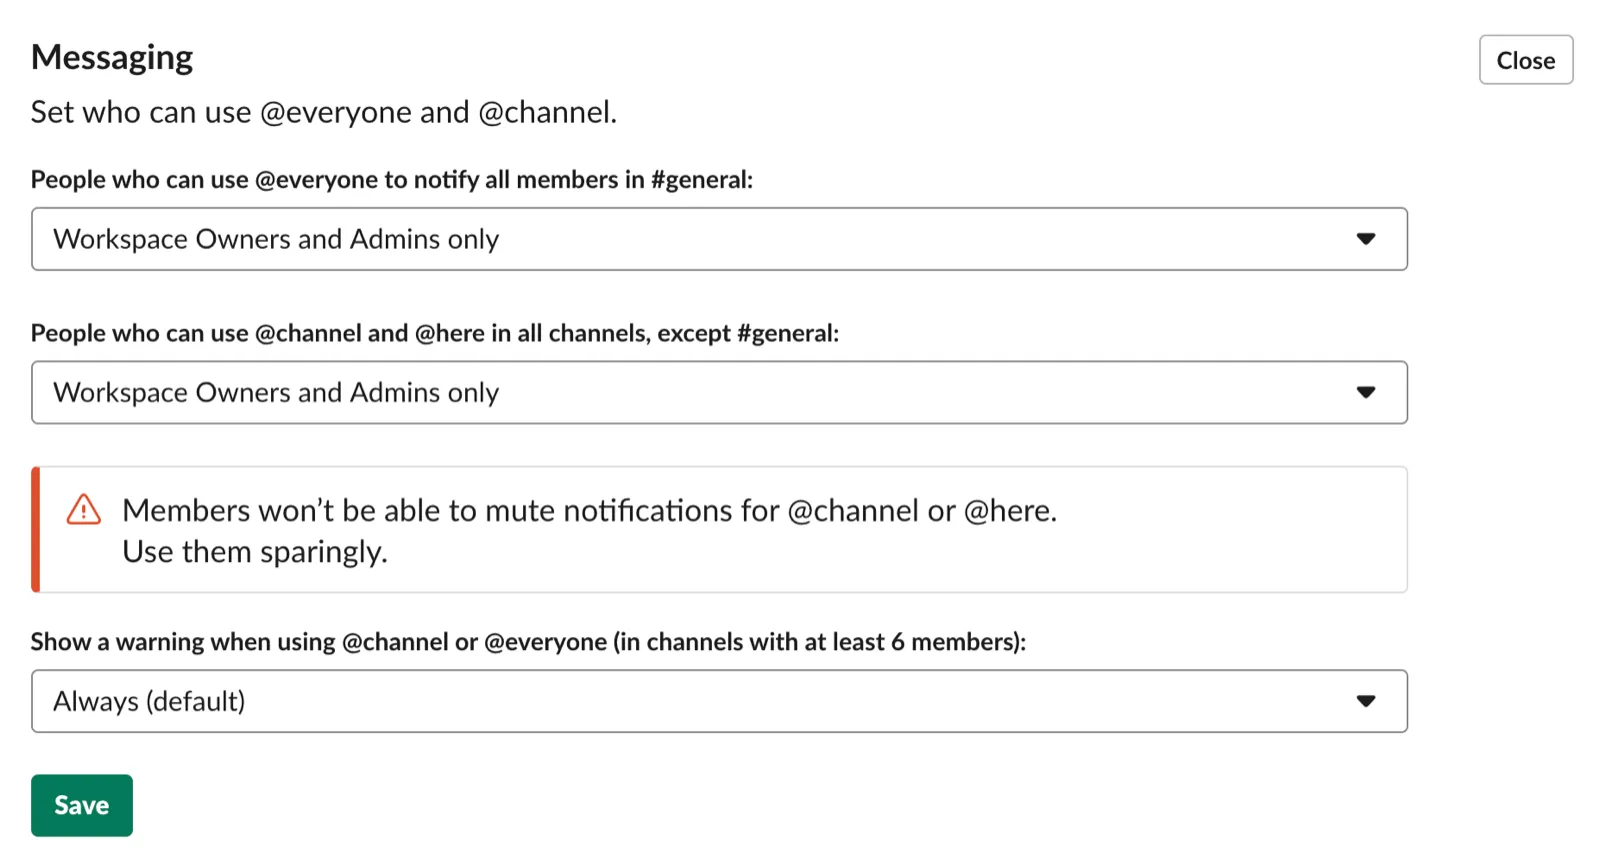
Limit messaging
You don't want people to abuse @everyone or @channel and cause other members to mute your Slack community. Restrict those powers to admins.
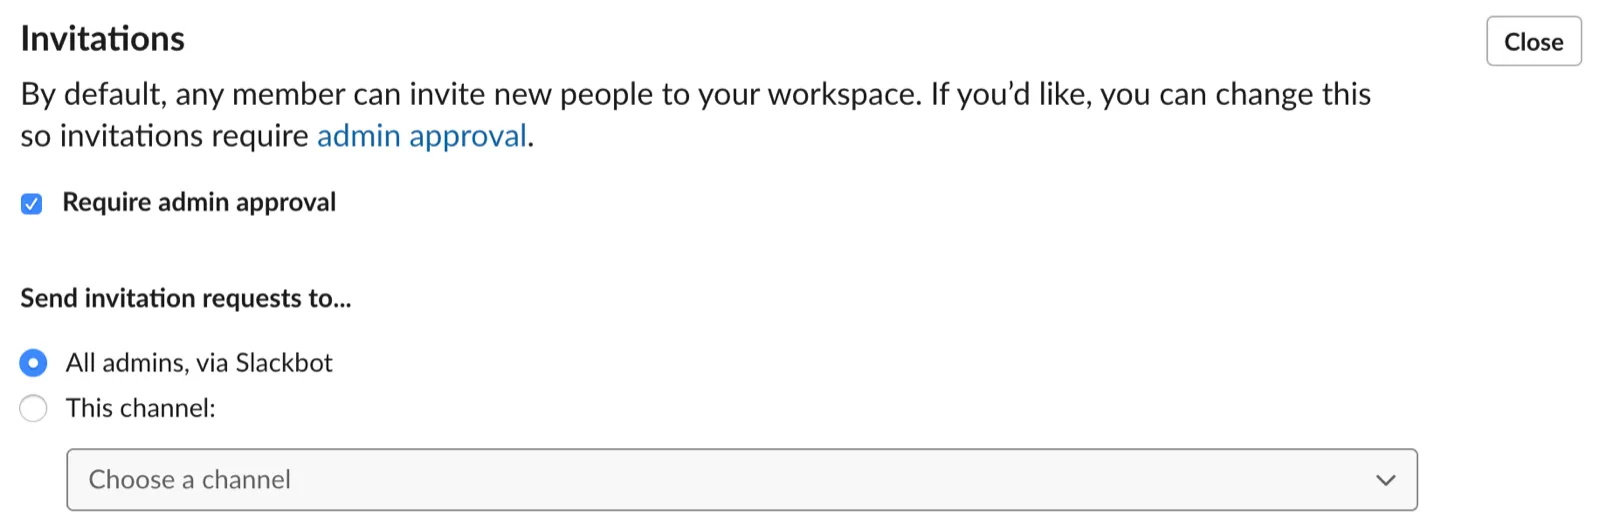
Limit invitations
If you want to make sure that only people with the invite link can join, require admin approval for member invitations.
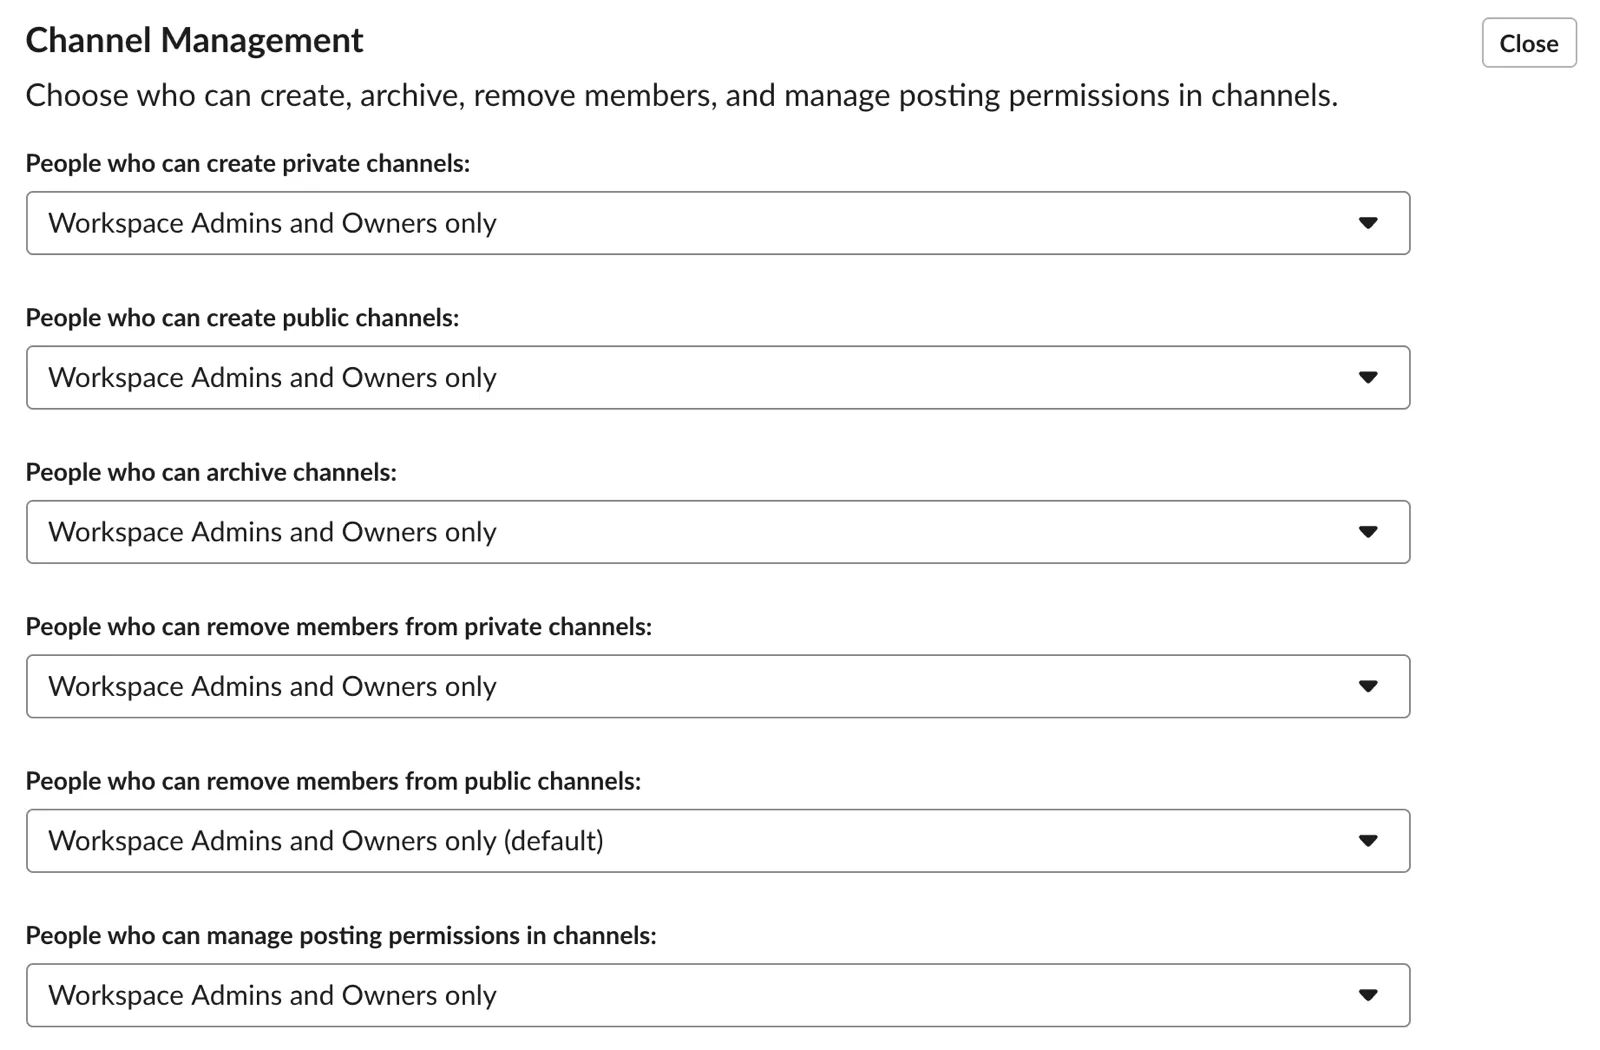
Limit channel management
If you don't want people creating their own channels, restrict that ability to admins.
Limit #general channel
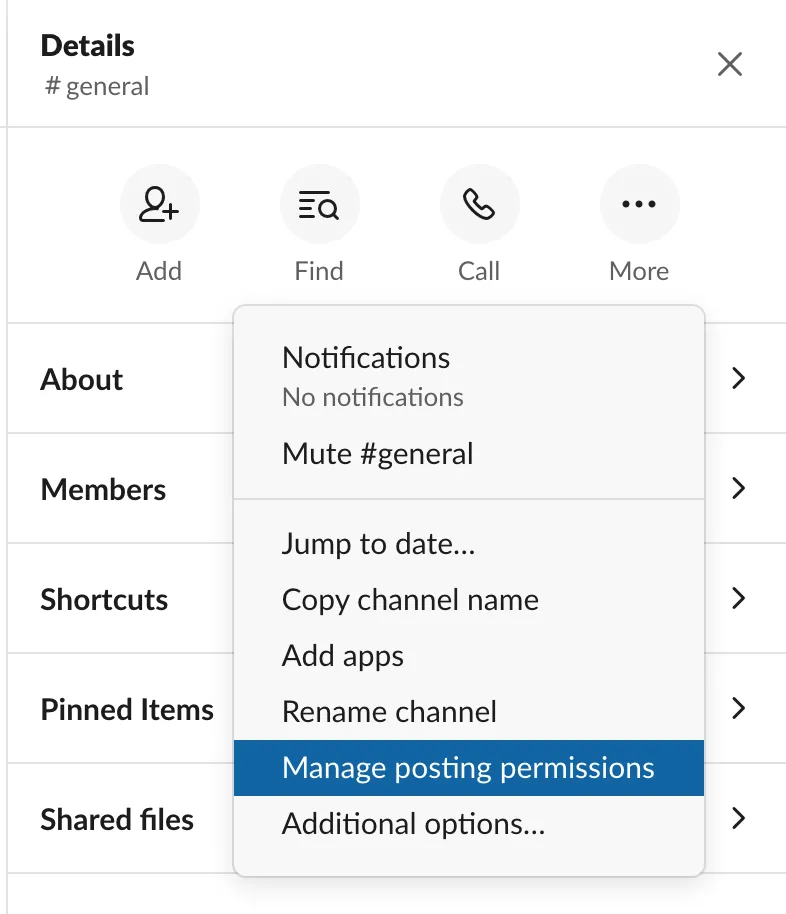
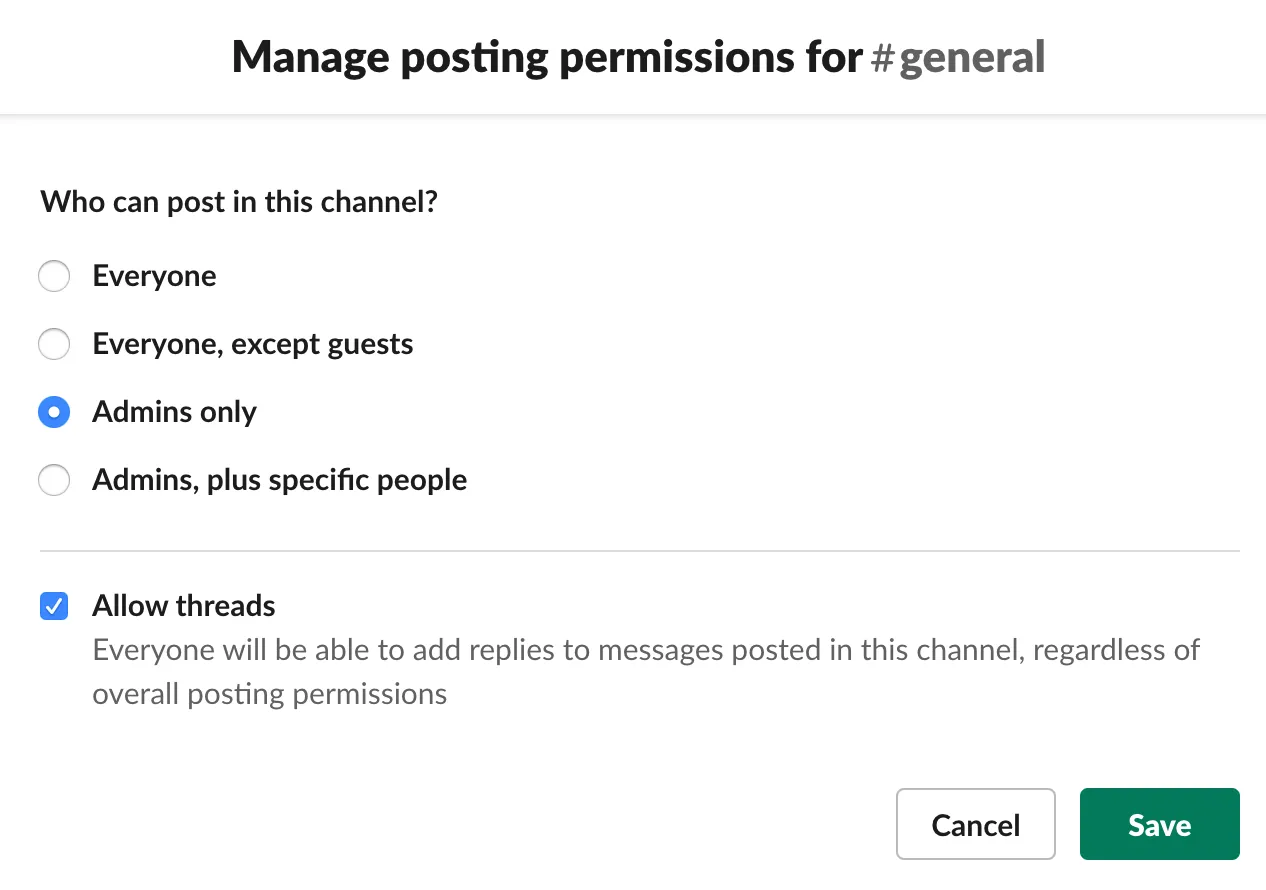
I wanted to use the #general channel strictly for announcements so that people can easily reference them instead of having them be buried by conversations.
Slack allows you to limit who can post in any channel, so I restricted the ability to post in #general to admins.
Step 4: Prepare your Slack
When people join your Slack, you don’t want them wondering what they should do next. Give them something to do!
The most common practice I’ve seen is to create a #intros or #introductions channel where people share a bit about themselves. It’s a great way to get people to post and learn about other people in the community.
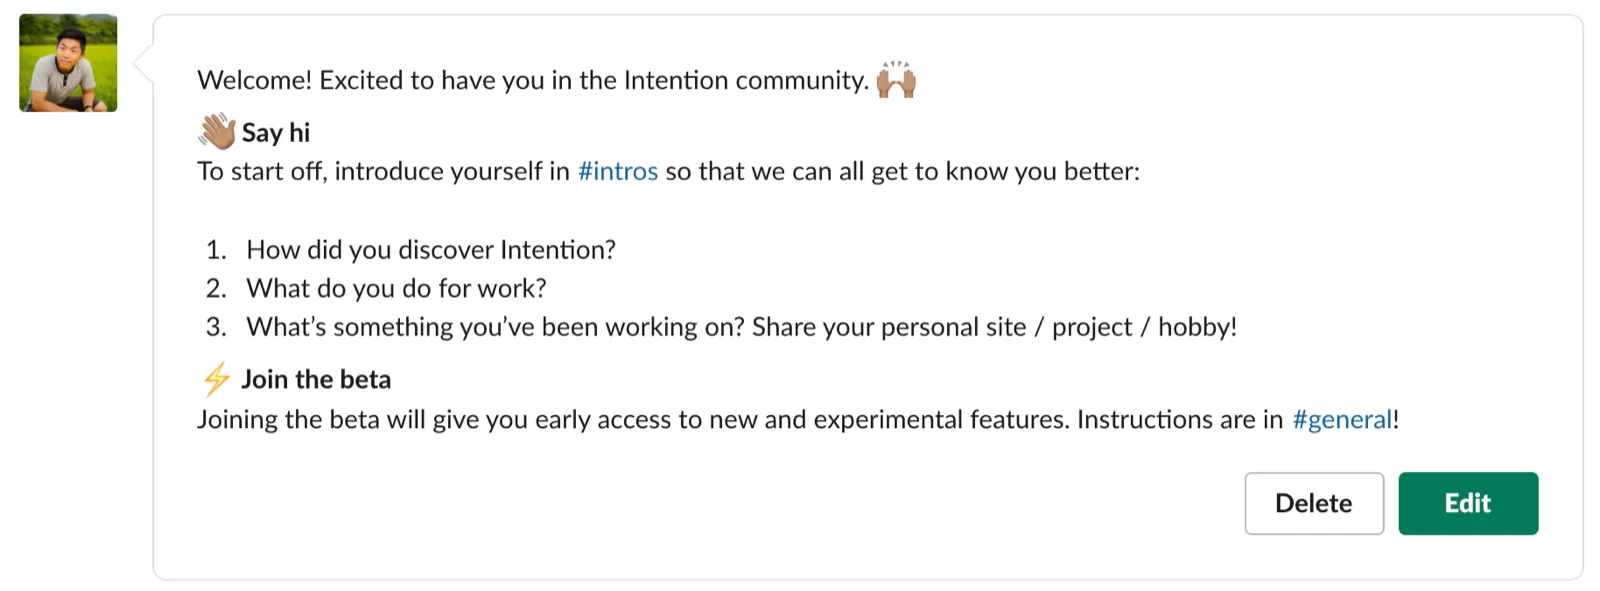
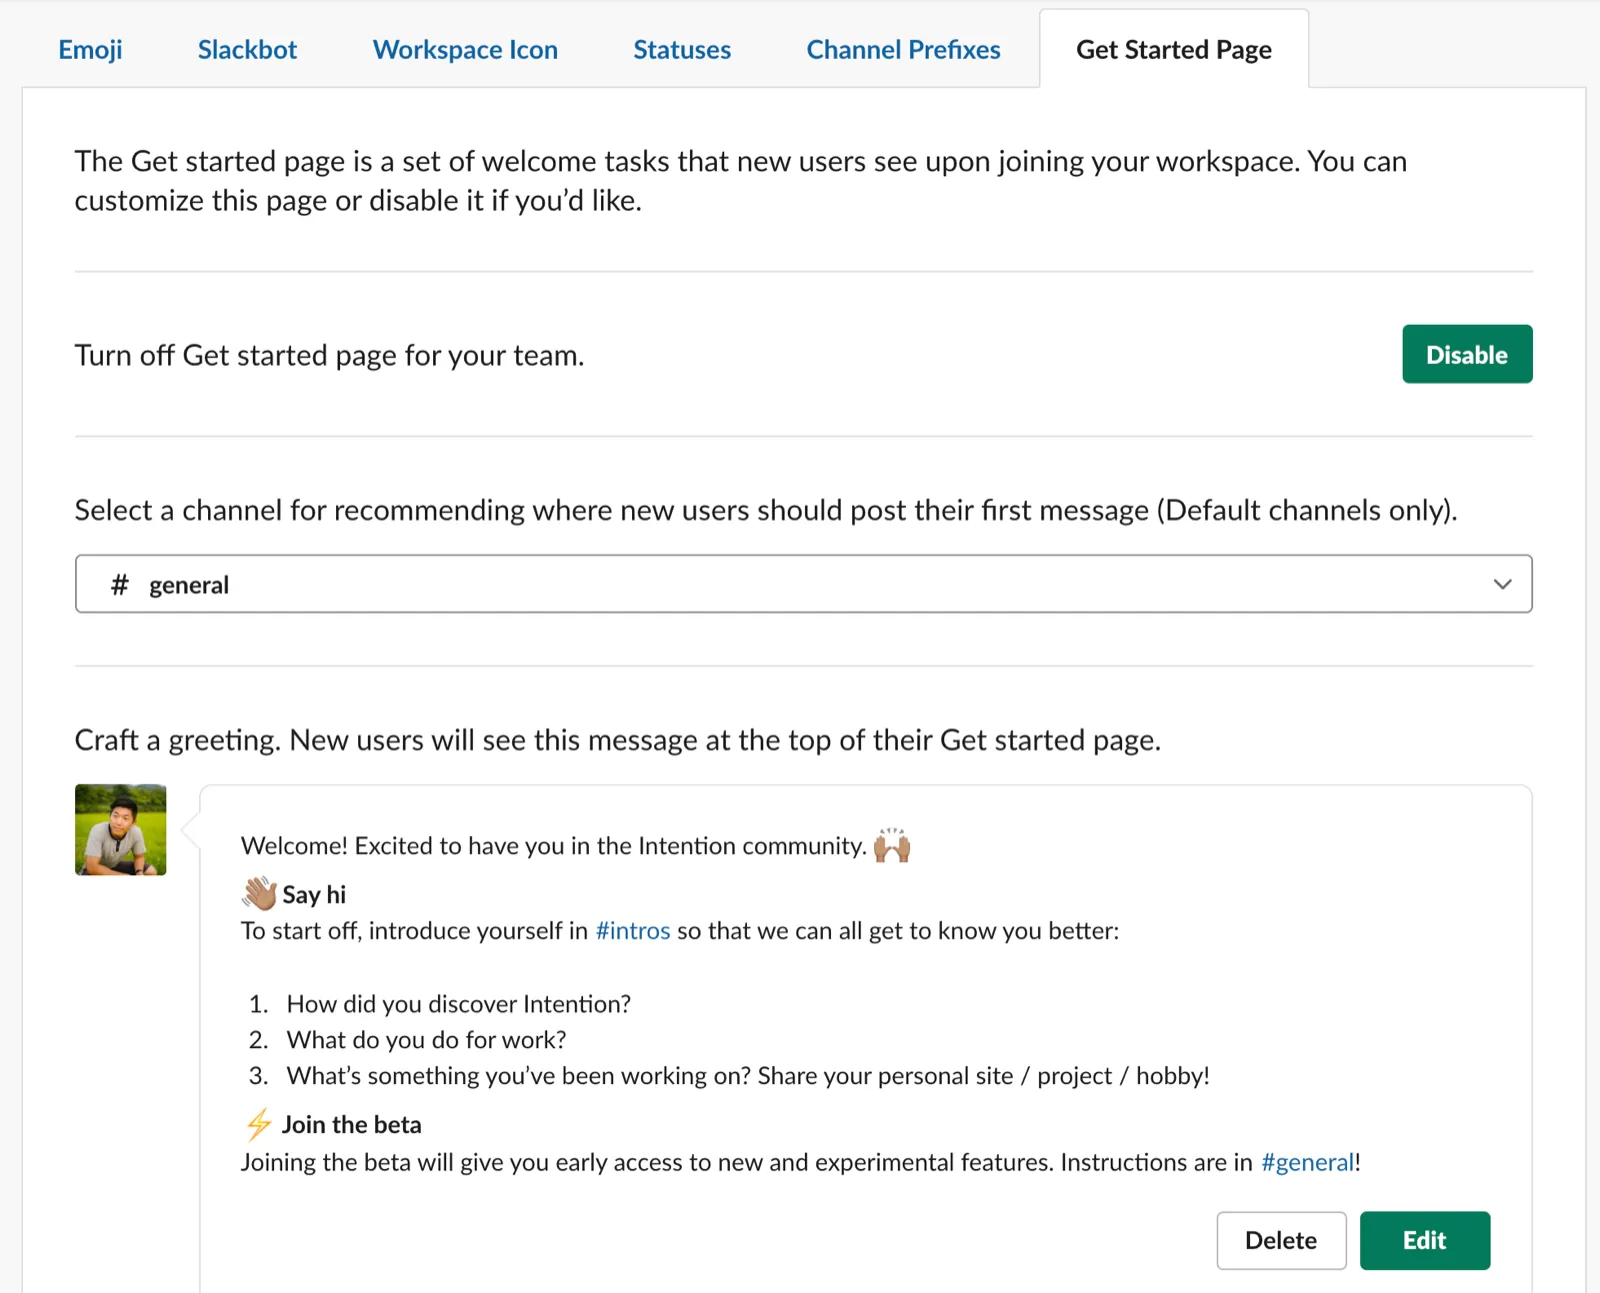
Set up your Get Started message
You can set up a Get Started message that new users see upon joining the workspace. Here’s the one I used:
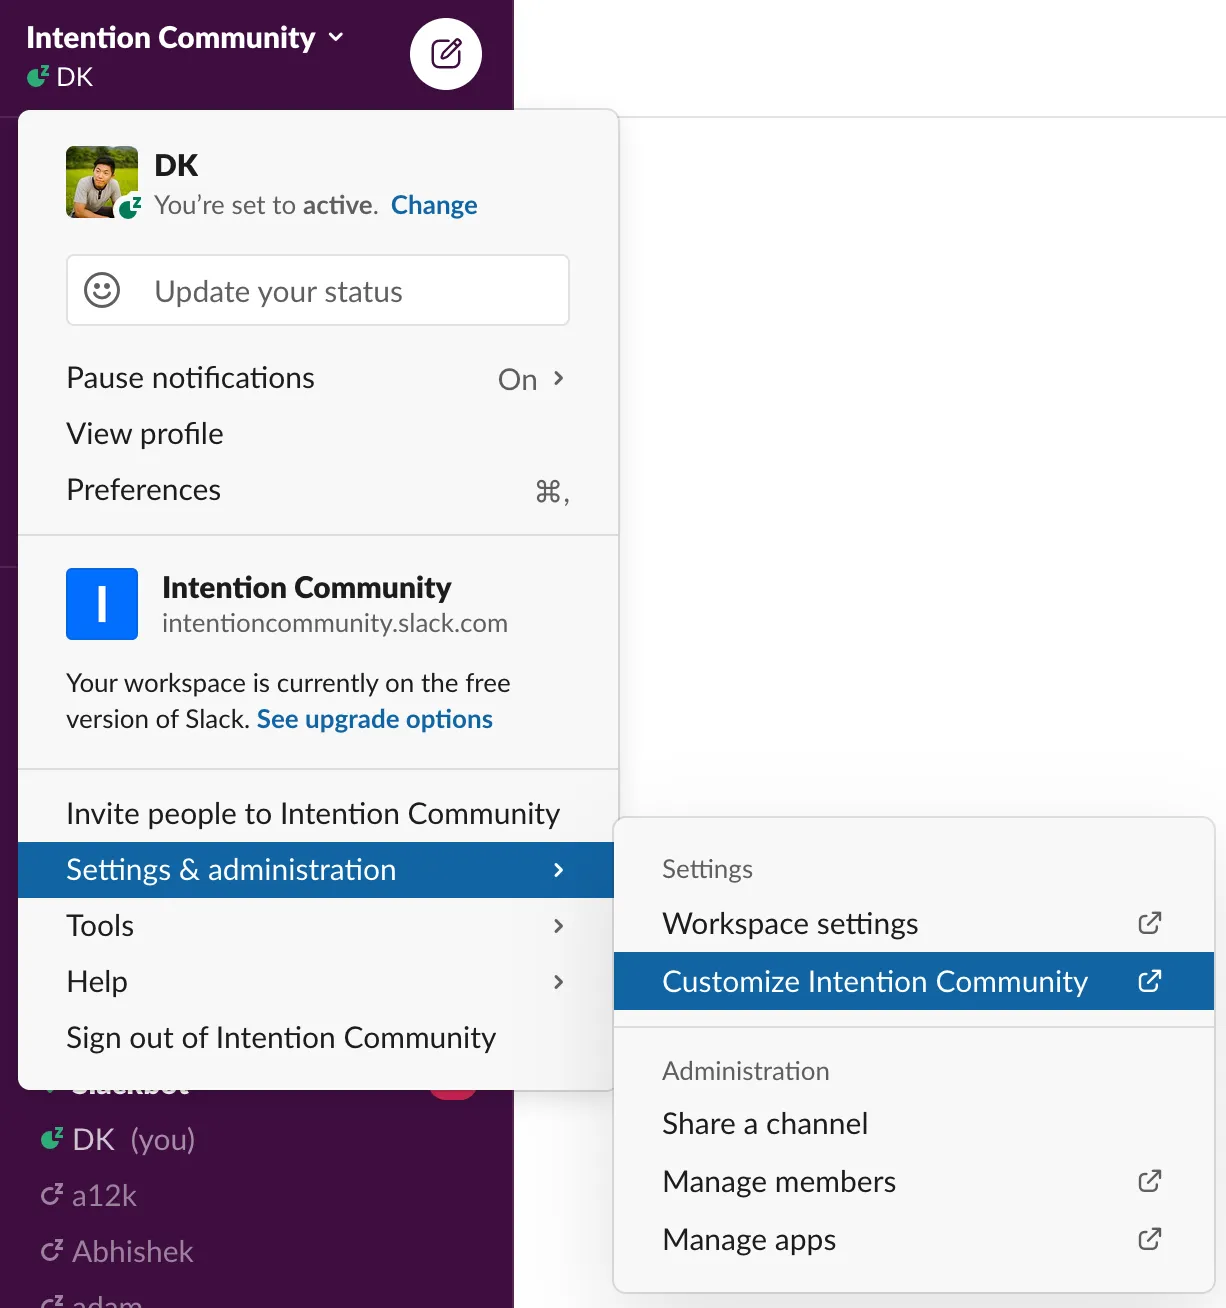
Set your Get Started message
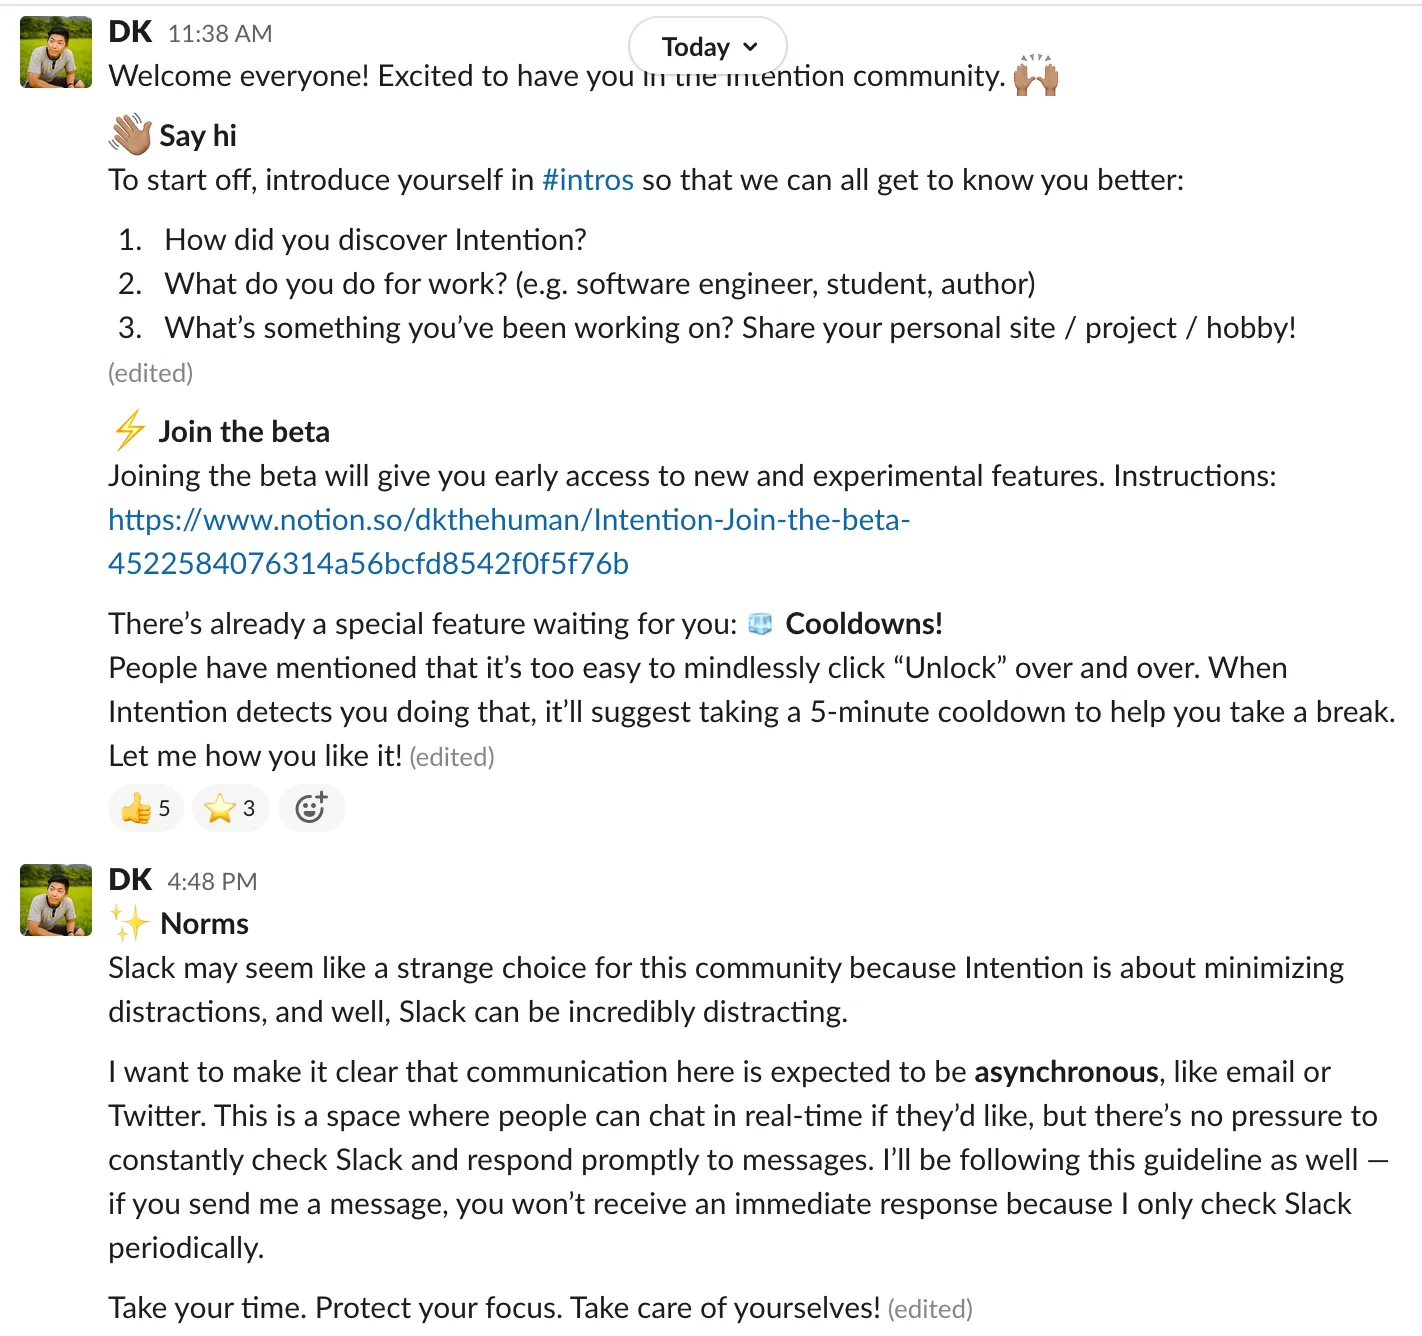
I also put the message in the #general channel in case people wanted to reference it later:
Create default channels
In addition to the #intros channel, I created channels in advance to anticipate the types of discussions in the community:
- #feedback: Feature requests and bug reports
- #general: Announcements
- #intros: Introductions
- #random: Anything people want
Step 5: Invite everyone
Once I had everything set up, I emailed everyone who had signed up on my form.
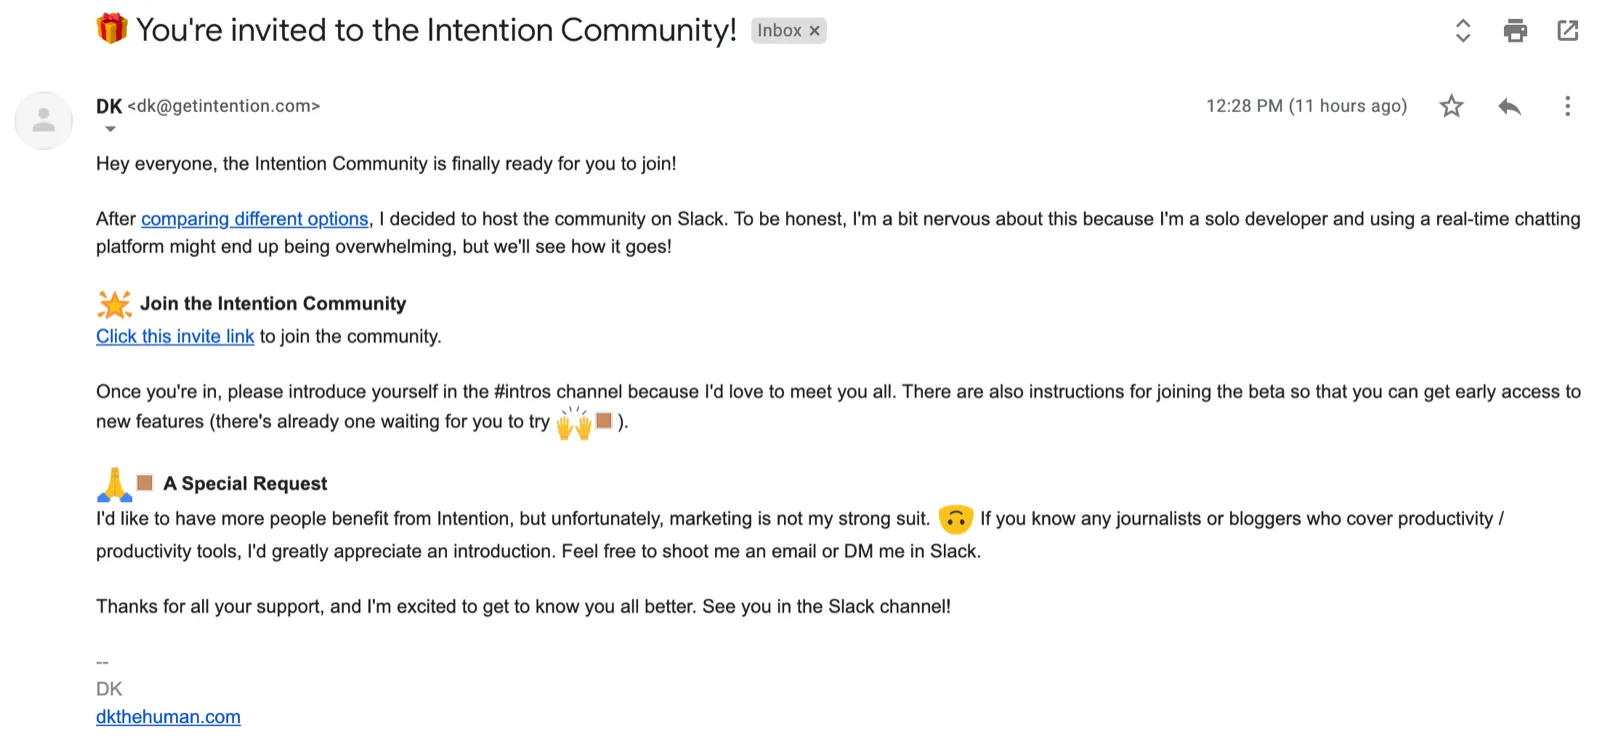
Tips:
- Put everyone in BCC so you don’t expose everyone’s email addresses
- Don’t use skin tone emojis because Gmail will ruin them
- Be a real person
Step 6: Be a welcoming host
12:28 PM: I send the invitation email to 188 people.
12:30 PM: My friend Jeremy joins.
Me:
it sure is lonely in here
Jeremy:
lmao, im sure ppl will filter in
12:40 PM. No one else has joined. I start to wonder if my email had been flagged as spam. But Jeremy got here fine…?
12:50 PM. Still nothing. I wonder if I’ll have to redo this whole thing.
12:53 PM - 12:59 PM: 6 people join the workspace all at once, start posting in #intros, and I realize everything’s fine.
As people trickled in, I DMed them to welcome them and let them know that I’m available for help:
hey <name>, welcome!! let me know if you have any questions or if you run into any trouble joining the beta
By the end of the day, 45 people had joined the workspace, 24 people had introduced themselves in #intros, and the community is now officially up and running!